Texture Packer - part 1:
Texture packer はアンドレス・ロー氏によって開発された強力なツールです。このツールによってもたらされる最も重要な機能についていくつか説明します:- easily create textures for your sprites, you can actually see how big your texture should be, which means you can save some memory.
- テクスチャーを様々な形式でエクスポートします (png, pvr...)
- 低品質のテクスチャとディザリングを使ってメモリ使用量を減らすことができます (もっと見る)
1. Texture Packer とAndEngineを連携する:
- 最初の手順で、以下のリンクを使って、GIT リポジトリからTexturePacker とAndEngine Texture Packer 拡張をダウンロードする必要があります:
- Install Texture Packerをインストールし、texture packer 拡張ソースをあなたのゲームプロジェクトにリンクします。 まだやり方が分からない場合は、engineの設定方法を参照してください。
2. Texture Packerでテクスチャを作成する:
この例では、.pngテクスチャを出力する規定の設定を使用しています。 Spriteが四つあるとします。あらかじめインストールしたTexture Packerを起動して、SpriteをSprites フィールド(右にある)にドラッグアンドドロップしてください。 以下の画面が表示されます (クリックで大きくなります)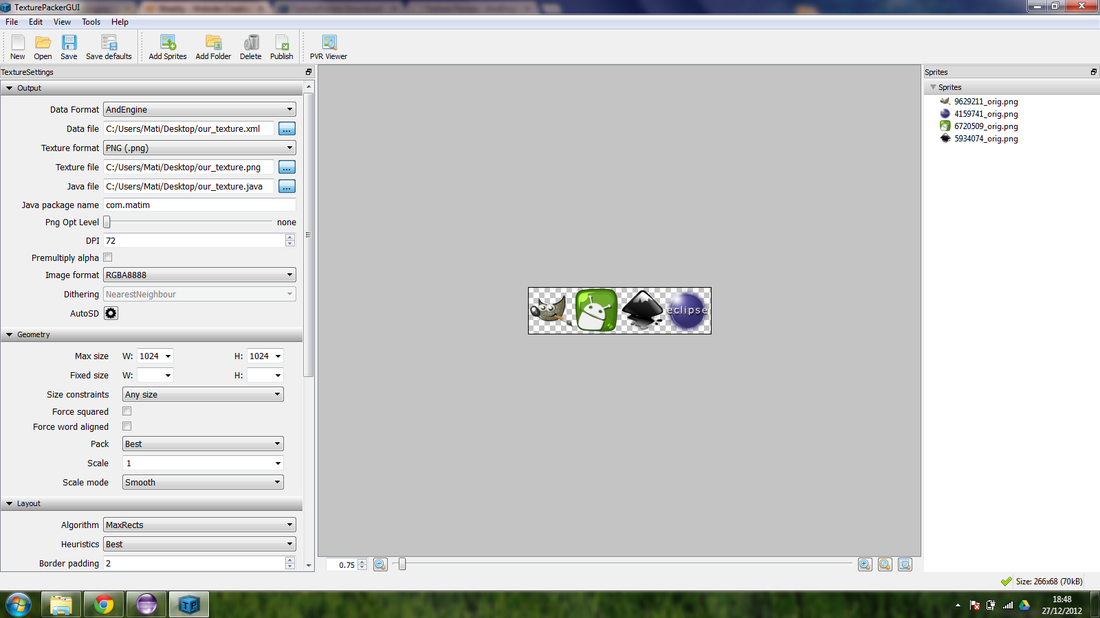
- Data Format: AndEngine
- Data File: 出力がコピーされるパッチを選びます (例. Desktop/our_texture.xml)
- Texture format: 我々は png.を使用しています
- Texture File:出力がコピーされるパス (例. Dekstop/our_texture.png)
- Java File: 出力がコピーされるパス (例. Desktop/OurTexture.java)。この java ファイルは、単に特定のSpriteのIDを保持しています。後でこれを使用して、ゲームで使用するテクスチャ領域を作成します。
- Java Package Name: 生成されるjavaファイルのパッケージ名を入力します (このjavaファイルは後であなたのプロジェクト内にコピーペーストするので、適切なパッケージ名を使用してください)
- PNG Opt Level: 生成されるongファイルのサイズを減らしたい場合は、この項目を操作します。高い値を設定すると、 texture packerがテクスチャを作成する処理が長くなるので注意してください。通常は数秒かかります。アプリサイズを減らす必要がある場合に有効です。
- Image Format: 我々は高品質のRGBA 8888 を使用していますが、メモリ使用量も最も高いので、低品質のテクスチャ(RGBA 4444)を使用して、劣化した品質を補うためにディザリングを有効にし、メモリ使用量を50%カットすることができます。 - 詳細情報についてはこの記事を参照してください!
- 最大サイズには、1024x1024を使用するほうが良いでしょう。多くの端末では、まだ大きなテクスチャをサポートできておらず、クラッシュや別の問題を引き起こすことがあるためです。
- サイズを減らす必要がある場合、テクスチャのサイズには任意のサイズを使用してメモリ使用量を減らせます (テクスチャサイズの2の冪乗要件は GLES2にはありません!)
- トリムモード(trim mode)は使用しないでください。この機能はAndEngineではサポートされていません。
- 回転機能を使用することができます。場合によっては、テクスチャサイズを減らせます(メモリ使用量を減らせます)
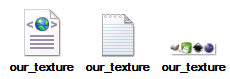
- 一つのテクスチャファイル (この例では our_texture.png)
- 一つのデータファイル (この例では our_texture.xml)
- 一つのjava ファイル (この例では OurTexture.java)
これで最初の手順は完了です。ゲームで使用するテクスチャの準備ができました。 最後に、後からでも編集できるようにするためにテクスチャファイルのプロジェクトファイルを保存してください。
3. 以前に作成したテクスチャを読み込む:
前に説明した手順に従ったのであれば、既にAndEngine Texture Packer 拡張をダウンロードして、そのソースをあなたのプロジェクトにリンクしているでしょう。 これで、以前作成したテクスチャをゲームで使用する準備ができました。
Texture Packerで作成したファイルをassets フォルダ(あなたのアプリプロジェクト内の)に配置します。
private TexturePackTextureRegionLibrary texturePackLibrary;
private TexturePack texturePack;

private ITextureRegion textureRegion_0;
private ITextureRegion textureRegion_1;
private ITextureRegion textureRegion_2;
private ITextureRegion textureRegion_3;

private void loadGraphics()
{
    try
    {
        texturePack = new TexturePackLoader(getTextureManager(), "gfx/").loadFromAsset(getAssets(), "our_texture.xml");
        texturePack.loadTexture();
        texturePackLibrary = texturePack.getTexturePackTextureRegionLibrary();
    }
    catch (final TexturePackParseException e)
    {
        Debug.e(e);
    }

    textureRegion_0 = texturePackLibrary.get(OurTexture.SPRITE0_ID);
    textureRegion_1 = texturePackLibrary.get(OurTexture.SPRITE1_ID);
    textureRegion_2 = texturePackLibrary.get(OurTexture.SPRITE2_ID);
    textureRegion_3 = texturePackLibrary.get(OurTexture.SPRITE3_ID);
}
上記はどういった処理をしているでしょうか? assetsからデータファイルを読み込んで、テクスチャパックとテクスチャパックライブラリ(テクスチャ領域を解析して保存するための)を作成し、読み込んでいます。今回の例では、このデータファイルはour_texture.xmlと呼ばれています。
次に、get(ID)メソッドを使用してテクスチャ領域を作成します。これらのIDは手動で設定できますが、自動生成されたjava ファイルを使用して変数の設定をより簡単に行えます。(今回の例では、 Texture Packerで生成された OurTexture.javaです)
これで完了です。Texture Packerで作成したテクスチャの読み込みに成功しました。この方法で、任意の ITextureRegionを簡単に読み込むことができます。 ITiledTextureRegionを読み込みたい場合は - この記事を参考にしてください。