アプリケーションを配布する
このページの目的
ゲームを配布するメカニズムは、プラットフォーム間で異なります。 この記事では、Libgdx が公式にサポートしている各プラットフォームへ配布するには何が必要なのかを明確することを目指します。
注意: gradle を使用する場合は、このページに記述されたガイドラインに従うのが良いかもしれません。
Windows/Linux/Mac OS Xへ配布する
Windows/Linux/Macへ配布する最も簡単な方法は、 あなたが記述した全てのコード、libgdx と任意の拡張のコード、ゲーム素材を含んだ実行可能な JAR ファイルをEclipseで作成することです。 実行可能な JARファイルの作成方法は以下の通り:
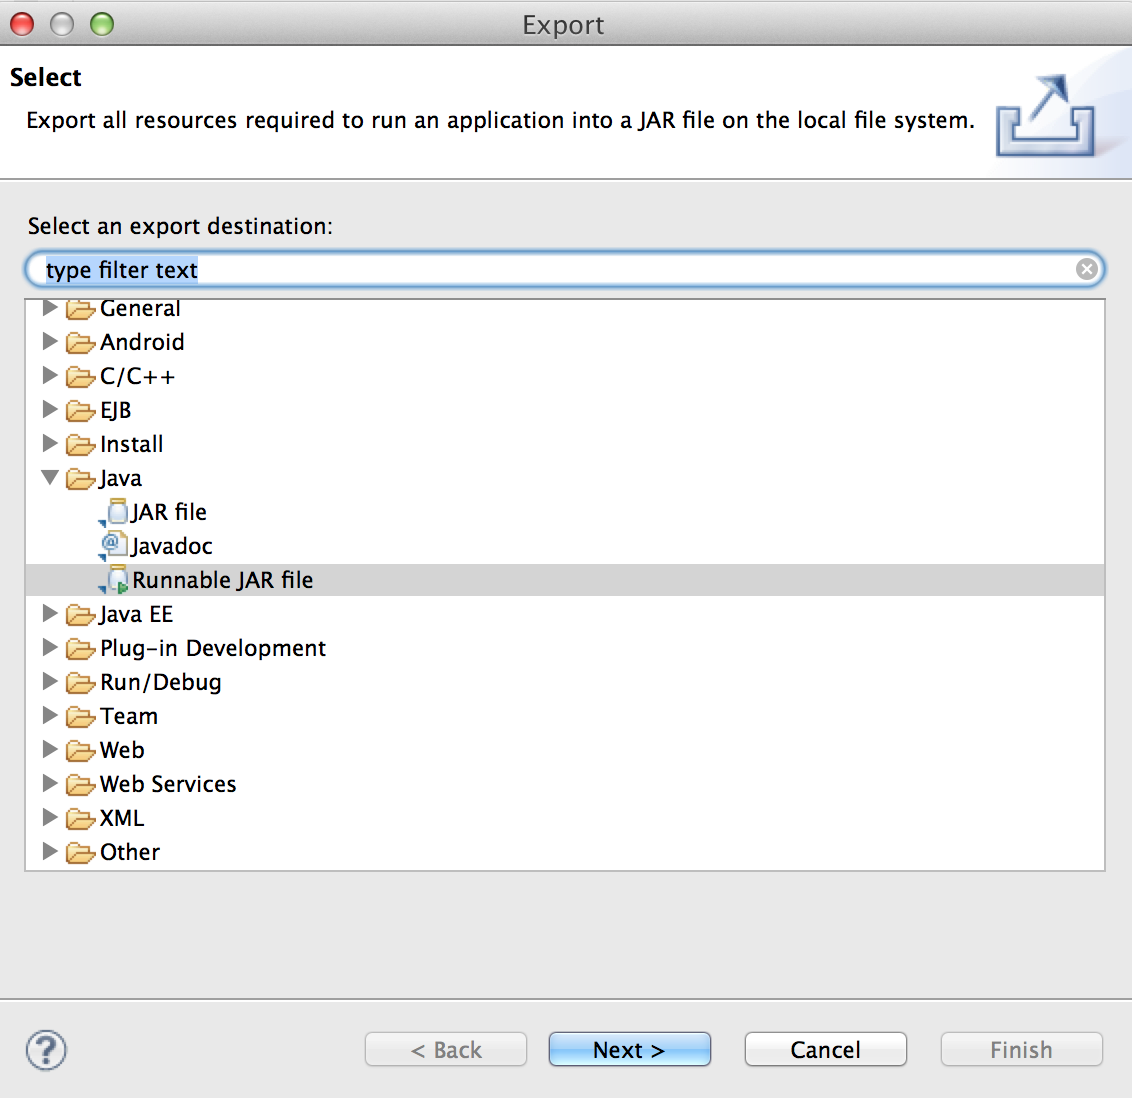
- デスクトッププロジェクトを右クリックして "Export"を選びます
-
次のダイアログで "Java -> Runnable Jar"と選んで "Next"をクリックします
-
次のダイアログでは、デスクトップゲームを開始するのに使う起動構成をEclipse内から選び、出力するJARファイル名を設定します。
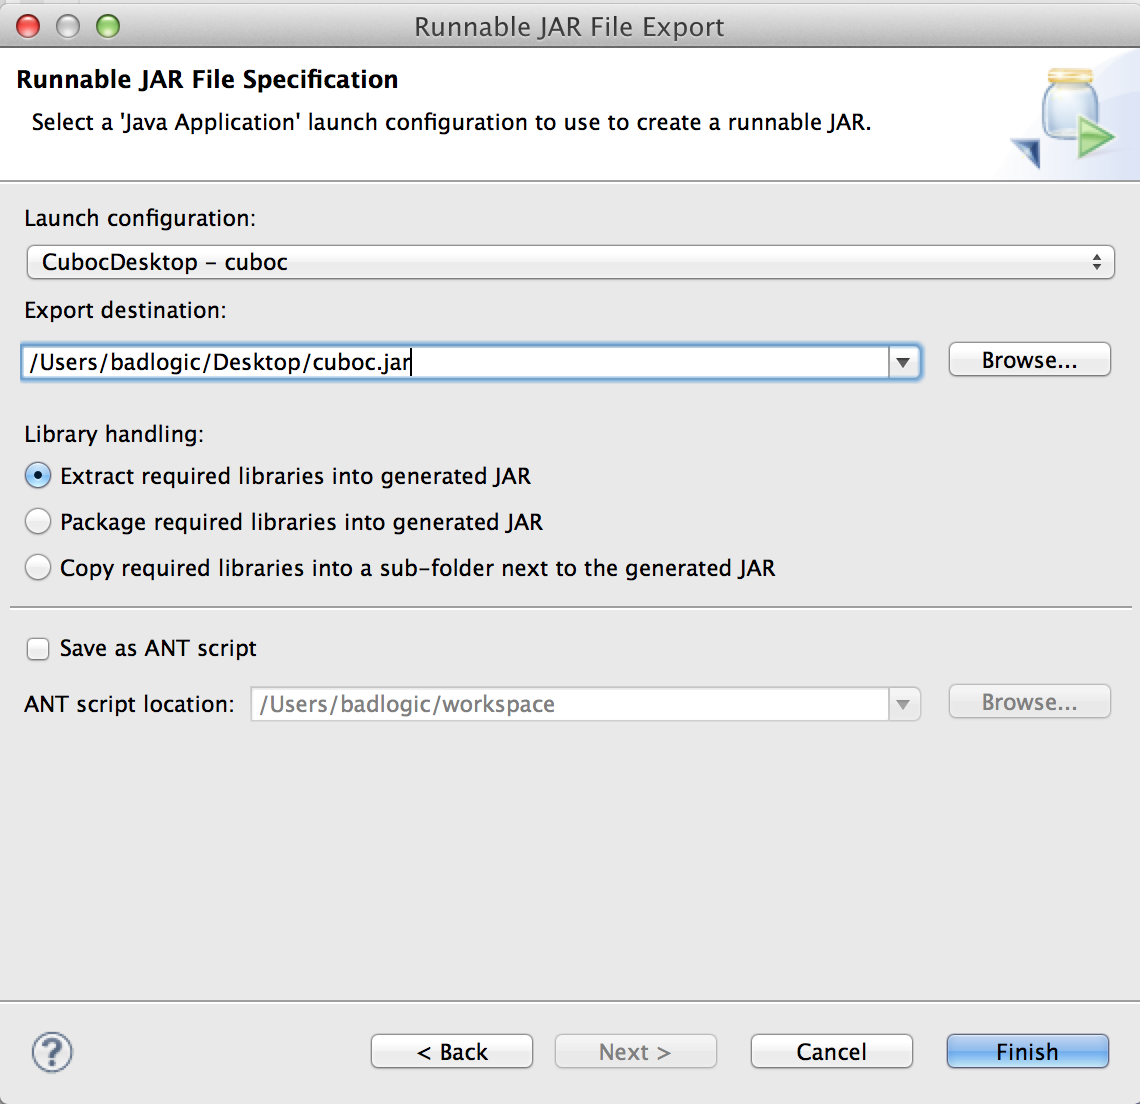
これで全てのコードとゲーム素材を一つのJARファイルにパッケージします。 JAR ファイルを実行するには、Java をインストールしているユーザーであればJARファイルをダブルクリックするだけです。
packr はJRE をデスクトップjarファイルにバンドルしてクロスプラットフォームで動作させるためのツールです。このツールは開発中のものです。
Androidへの配布
Android への配布には追加の手順が必要です。このチュートリアルでは、Eclipseと Android ADTプラグインを使って行います。
- Android プロジェクトを右クリックして "エクスポート"を選びます
- "Android -> Android アプリケーションのエクスポと"と選びます
- エクスポートするプロジェクトがあなたの意図したプロジェクトで間違いないか確認して nextを選びます
- 使用するキーストアの選択もしくは作成をします。初めてandrodi開発をする人のために説明しておくと、キーストアというのはあなたのアプリケーションを署名するのに使われ、 アプリケーションをマーケットで公開するのに必須のものです。 詳細情報についてはhttp://developer.android.com/tools/publishing/app-signing.htmlを参照してください。
- 署名のエイリアスを選択し、パスワードを入力します。エイリアスを持っていなかったり新しいエイリアスを作成したい場合は、新しいキーの作成を選んで nextを選んでください。
- アプリをエクスポートする出力先を選択します。これでGoogle Play(旧Android マーケット)やその他アプリストアへアップロードできる.apkファイルを選んだ出力先にエクスポートします。
- finish を選ぶと .apk ファイルがビルドされます!
注釈
- .apk ファイルは、Eメール添付やダウンロードなどの手段で直接端末にインストールするのに使用できます。これには、端末が設定で 'Allow Unknown Sources'オプションを有効にしている必要があります。残念ながらキャリアによってはこの設定は有効にできません。
- LibGDX は 公式にはAndroid 2.2以上が動作している端末へのみエクスポートすることができます。 LibGDX 0.9.9を使用している場合は、Android 1.5以上にエクスポートできます。 OpenGL ES 2は特定の端末上ではサポートされていないといった具合に、端末ごとにサポートされている機能は異なる場合があります。
- OpenGL ES 2 の動作には Android 2.2 以上と対応しているグラフィックカードが必要です。
- kitkat以前の端末で没入モードを使用するといったように、 動作端末ごとに互換性のない機能については、サポートしていない端末上では単に何も動作しません。
- google playにアプリをアップロードしたい場合は、このお役立ちリンクを参照してください: http://developer.android.com/distribute/googleplay/publish/register.html
- LibGDX ではバージョン 0.9.9からx86 Android端末のサポートを開始しています。プロジェクト内にライブラリのx86フォルダがあるか確認してください。 現状では Gdx-setup-ui を使ってプロジェクトを作成していればこのフォルダも生成されているでしょう。
iOSへの配布
この項目は、あなたがiOS アプリの基本的な開発手順について理解していることを想定して書かれています。
前提条件:
- An OSX machine with Xcode installed (or the equivalent Hackintosh) and an Apple developer license account all established and paid for
- Your app is configured in
itunesconnect.apple.comwith a version number that matches yourios/robovm.propertiesfile - You have a matching distribution certificate set up at
developer.apple.comper usual
On your build machine, open Xcode, go to Preferences -> Accounts, provide your login and choose View Details. Tap the "Recycle" button at bottom left. This will download all necessary certificates to a place that the RoboVM Eclipse plugin expects to find them. Click Done and exit Xcode.
Insert more here about tweaking the files: info.plist.xml, robovm.properties and robovm.xml.
Go into Eclipse, right click on your projectname-ios and choose RoboVM Tools -> Package for App-Store/Adhoc Distribution. In the resulting dialog, pick a directory where you wish the IPA and associated files to be placed, choose your signing identity (usually your company, not your machine's identifier), and the provisioning profile for this app (from developer.apple.com).
This will generate the projectname.IPA file. Now you are able to use the Application Loader to locate your IPA and submit it to iTunesConnect. It will appear under the Prerelease tab for your app, per usual. Then you can distribute to your TestFlight testers etc., per the usual Apple procedure.
HTML/JSでの配布
HTML/JSでの配布は、たいていの場合とても簡単です。
- HTML用 プロジェクトを右クリックして "Google -> GWT Compile"を選びます
- 既定の設定のままにして compileをクリックします
- WAR ディレクトリの選択を求めるウィンドウが表示されます。WAR ディレクトリは HTML用 プロジェクトのフォルダ内にあります。
- GWT がコードをjavascriptにクロスコンパイルします。これにはしばらく時間がかかりますが、Eclipseのコンソールを引き上げることで進捗状況を表示できます。
コンパイルが完了すると、ウェブ上でゲームを実行するのには必要なものは全てWAR ディレクトリ内に格納されます。 RPC コールやその他サーバサイドオペレーションを使用していない場合は、まだやることが少し残っています。
- "index.html" ファイル、 assets フォルダ、名前が"mygdxgame.GWTDefinition"で終わるフォルダ をウェブサーバ上のディレクトリへコピーします
- URL を開くと、ゲームの読み込み画面が表示されるでしょう
注釈:
- コード内でサーバサイドオペレーションを使用している場合は、Tomcat もしくはそれと同等の機能を持つソフトウェアをウェブサーバにインストールして、 プロジェクトのWARディレクトリ内の全てのコンテンツを"webapp" ディレクトリに配置する必要があります。 詳細については ここを参照してください。